Where to Stow a Paddle Board on a Small Boat: 3D-Printed Stanchion Rack Brackets
A paddle board is the best toy on a cruising boat and the worst thing to stow. Inflated, it is two and a half to three and a half metres of buoyant foam that wants to live on deck, where it blocks the side deck, chafes on the lifelines, catches the wind and, in any kind of sea, tries to leave. Deflating it every time you move is a twenty-minute job nobody does after the first week. Chandlery rail racks exist, but they are built for one tube diameter, cost more than the pump, and the stainless ones still need a ladder of hose clamps or a drilled stanchion. This guide covers the sensible alternative: a pair of printed brackets that clamp around your stanchions or guardrail, sized to your exact tube, and hold the board outboard of the lifelines where it is out of the way.
Why deck-stowing a SUP goes wrong
Most people start by lashing the board flat on the foredeck or along the side deck with a couple of bungee cords. Three problems appear quickly. The board covers hatches, cleats and the path to the bow, so every sail change means climbing over it. It rubs on stanchion bases and lifeline fittings, and a stainless split pin will cut through PVC in a weekend. And a flat board is a sail: a gust across the deck lifts the windward edge, the bungees stretch, and the board either slaps down or goes over the side.
The fix boat builders use on bigger yachts is a vertical or angled rack on the rail: the board stands on edge against the outside of the lifelines, supported by two arms, strapped in place. On edge it presents almost no area to the wind, it sits outboard of the walkway, and the lifelines themselves become part of the cradle. The problem has always been buying arms that fit your rail.
Why a printed bracket beats the bought one here
Stanchions are not standard. Common tube sizes are 22 mm, 25 mm and 1 inch (25.4 mm), guardrail tubing runs up to 30 mm or more, and older boats often have an odd size that nothing in the catalogue quite fits. A commercial clamp meant for 25 mm will rattle on a 22 mm stanchion and will not close on a 30 mm rail. Shimming with rubber works for a season and then the rubber goes hard and the clamp slips.
A parametric bracket removes the guesswork. You measure the tube, type in the diameter, and the two halves of the collar are generated to close around that exact size with the bolt tension pulling them tight. Because the model also lets you set the arm length and height, you can match the bracket to the thickness of your board and the height of your rail. The other advantage is that you print two, three or four for the cost of filament, so a second board or a kayak is not a second purchase.

The bracket: what it is and what you can change
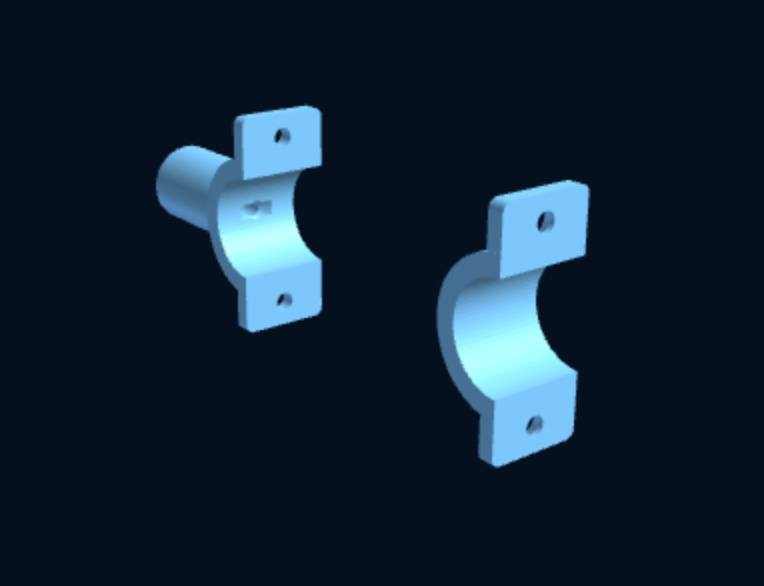
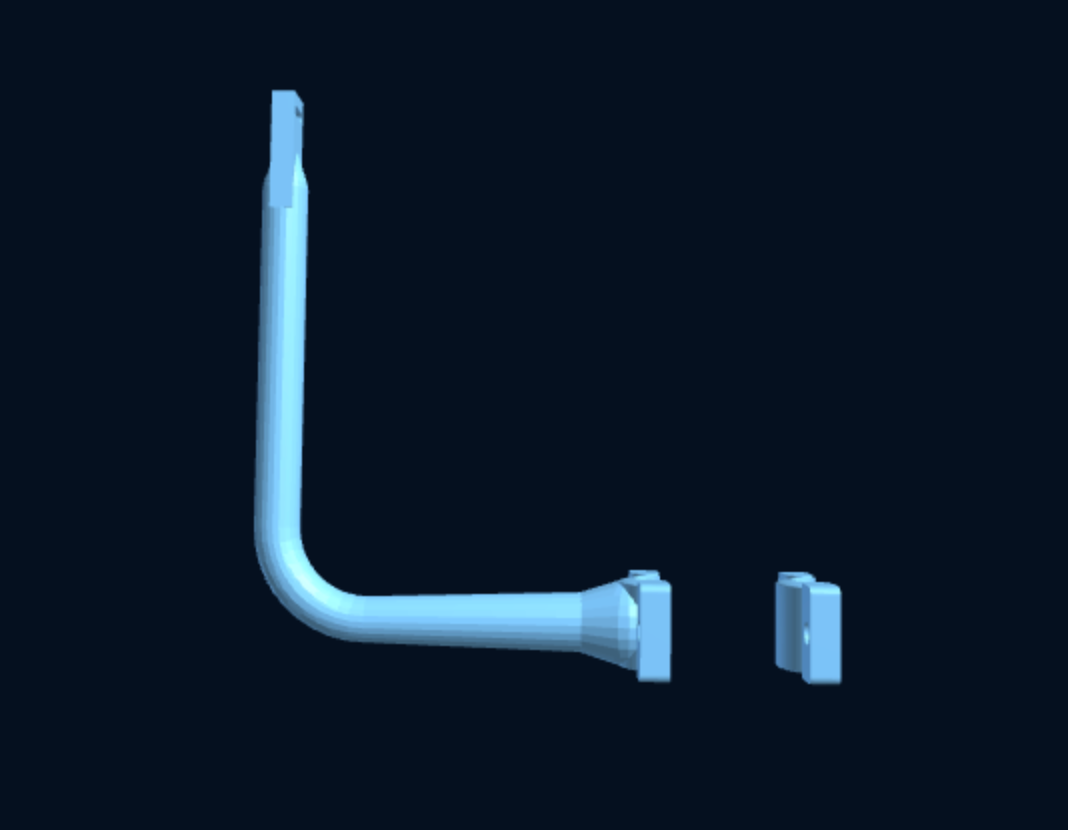
The Surf & SUP / Paddle Board Rack for Stanchions & Guardrail is a two-piece clamp with an integral L-shaped arm. The collar halves bolt around the stanchion or guardrail tube, so there is no drilling and nothing permanent on the rail. The arm is a solid 20 mm diameter section with a 95° elbow and a soft bend, reinforced at the base where the bending load is highest; it projects outboard and then upward, so the board rests on the horizontal leg and leans against the vertical one. The tip of the arm has a 3 mm slot for the strap. You use two brackets per board, one near each end, and the board sits between the arms and the lifelines.
Three parameters do the work:
- Stanchion / rail diameter: the inside of the collar is cut to this. Measure with callipers, not a tape, and measure where the bracket will actually sit, since tapered or swaged stanchions change size along their length.
- Arm length: how far the horizontal leg projects. It needs to clear the lifelines plus the thickness of the board, with a little spare so the strap can pull the board in without jamming it.
- Height: the vertical leg, which stops the board sliding off the end of the arm. Taller for a thick inflatable, shorter for a hard surfboard.
Hardware per bracket is two M5 bolts with a round or socket (Allen) head and two M5 hex nuts, suggested length 30 to 35 mm. The nut seats are moulded into the arm collar so the nut stays captive, and the head seats are on the opposite half, so assembly is one Allen key and no second spanner. Use A4/316 stainless; A2 will tea-stain within a season on a rail.
Measurements to take before you configure
| Measurement | How | Why it matters |
|---|---|---|
| Tube diameter | Callipers at the mounting height, two axes | Sets the collar bore; an oval or dented tube needs the larger reading |
| Board thickness | Inflated, at the rail, in the spot it will rest | Sets minimum arm length (add lifeline diameter plus ~10 mm) |
| Distance between chosen stanchions | Tape, centre to centre | Brackets should sit roughly a third in from each end of the board |
| Clearance below | From rail to toe rail or deck edge | Make sure the board's lower edge lands on a soft spot, not a cleat or fairlead |
Material and print settings
This is a load-bearing, permanently outdoor part with a long lever arm, and the material recommendation is not negotiable: use a carbon-fibre-filled filament. The product page lists PA612-CF as the best choice (toughest, UV and water resistant, lowest creep), with PETG-CF and ASA-CF as good alternatives. Plain PETG will hold a board at the dock, but the arm will slowly droop in summer sun with a heavy inflatable on it, and plain PLA will not survive at all. All the CF options are abrasive, so fit a hardened steel nozzle. If you have never printed a carbon-filled filament, the notes on drying, nozzle choice and orientation in our materials guide for boat parts are worth ten minutes before you start.
The settings from the product page are 0.2 mm layers, four or more perimeters and 40% or more infill. Perimeters matter more than infill on this part, because the load path is through the outer walls of the arm; six walls in PA612-CF gives a noticeably stiffer elbow than four. The model prints as two parts, the arm collar and the plain collar. Orient each so that the collar bore is vertical on the bed; that puts the layer lines around the tube rather than across it, so clamping force does not try to split the layers. The arm will need supports under the horizontal leg; tree supports remove cleanly from the round section. Nylon-based filaments must be dried before printing and the finished part will absorb a little moisture over its first weeks aboard, which actually improves toughness. For more on why orientation decides whether an arm like this snaps or bends, see print orientation and strength.

Installation and securing the board
Fit the two collar halves around the stanchion with the arm pointing outboard and slightly up, drop the nuts into their seats, and tighten the M5 bolts evenly with the Allen key until the collar grips firmly. Do not overtighten: the aim is a collar that will not rotate under hand pressure, not one that crushes. A wrap of thin rubber tape on the stanchion under the collar stops any chance of marking the tube and adds grip. Repeat for the second bracket at the same height, checked with a tape from the deck, so the board sits level.
Lift the board over the lifelines and lower it onto the horizontal legs, standing on edge, leaning inboard against the lifelines. Now run a textile webbing strap (better than rope, because it does not roll) through the slot on each arm and around the lifelines, and cinch it. The board is now held on three sides: arm below, lifelines inboard, strap outboard. A second strap around the board and the upper lifeline at each bracket stops it lifting in a following wind. Under way, check the straps after the first hour; new webbing stretches slightly. For offshore passages, take the board off the rail and lash it below or deflate it; a rack like this is for coastal cruising and harbour, not a gale.
Fins are the last detail. Position the board so the fin box sits between the brackets, not on a stanchion, and if you have removable fins, remove them so the board leans flat.
Related parts for the rail
The same two-piece collar idea works for lighter jobs. The Tube-Mount Clip Holder clamps to a stanchion or handrail and gives you a snap clip for a boathook, paddle or bilge pump handle. The Twin Pipe-Clamp Cross Bar spans two rails and carries the modular holder kits, useful for keeping the pump and leash next to the board. And the free Double C-Clip Hook is a handy way to hang a wet leash or a fin bag from the lifeline. All of them are in the deck & rigging collection. If you are wondering whether a printed part is the right call for a given deck job at all, what not to 3D print on a boat sets out the line we draw.

Safety note
3D-printed parts are not certified marine equipment. This bracket carries a board, not a person: never use it as a step, a handhold or a tether point, and remember that clamping anything to a stanchion adds load to the stanchion base. Check your stanchion bases are sound before fitting, inspect the brackets and bolts each season for cracks or UV chalking, and load-test the finished pair with the board in harbour before trusting them on passage. Use the recommended carbon-filled material and 316 hardware, and take the board off the rail for offshore passages or heavy weather.
Questions about sizing the collar for an unusual rail, or a stanchion that is not round? Write to info@marinelab3d.com with the measurements and a photo and we will help you configure the board rack correctly.